
Well at last I managed to find enough time to get to the craftroom and do the tutorial I planned. Infact I have done two, so look out tomorrow for the second one! I have included this with all my Tutorials for future reference. Just click on the Tutorials Tab at the top of my home page and you will find a myriad of useful and helpful ideas, not only from myself and also from other crafters that have really impressed me.
Todays tutorial is simple but so useful and it is a bit of upcycling too. So what is it? Well, do you remember the last card I made? Ok, no jokes now, it's not been that long...LOL!! I used this technique to create that card. Here's a reminder for anyone that may have missed it....

What I want to show you is another way to use your packaging from Spellbinders or other flat acetate packaging; and it includes using the dies that came in the packaging too! So two birds, one stone scenario, good aye!
When you cut your packaging from the dies take care to cut it as close to the curves as possible to create the biggest flat sheets of acetate as possible, it makes it easier for larger dies. Now all you have to do is decide which shape you want to cut first.

USING THE APERTURE OR WASTE PIECE
Step One: Cut your die shape from the acetate. Try to center your die on the acetate before putting it through your GC, Cuttlebug, Big Shot etc; this will be beneficial when using the template.
(Sorry about the glare on the acetate but I had to have it so the acetate would show up.)

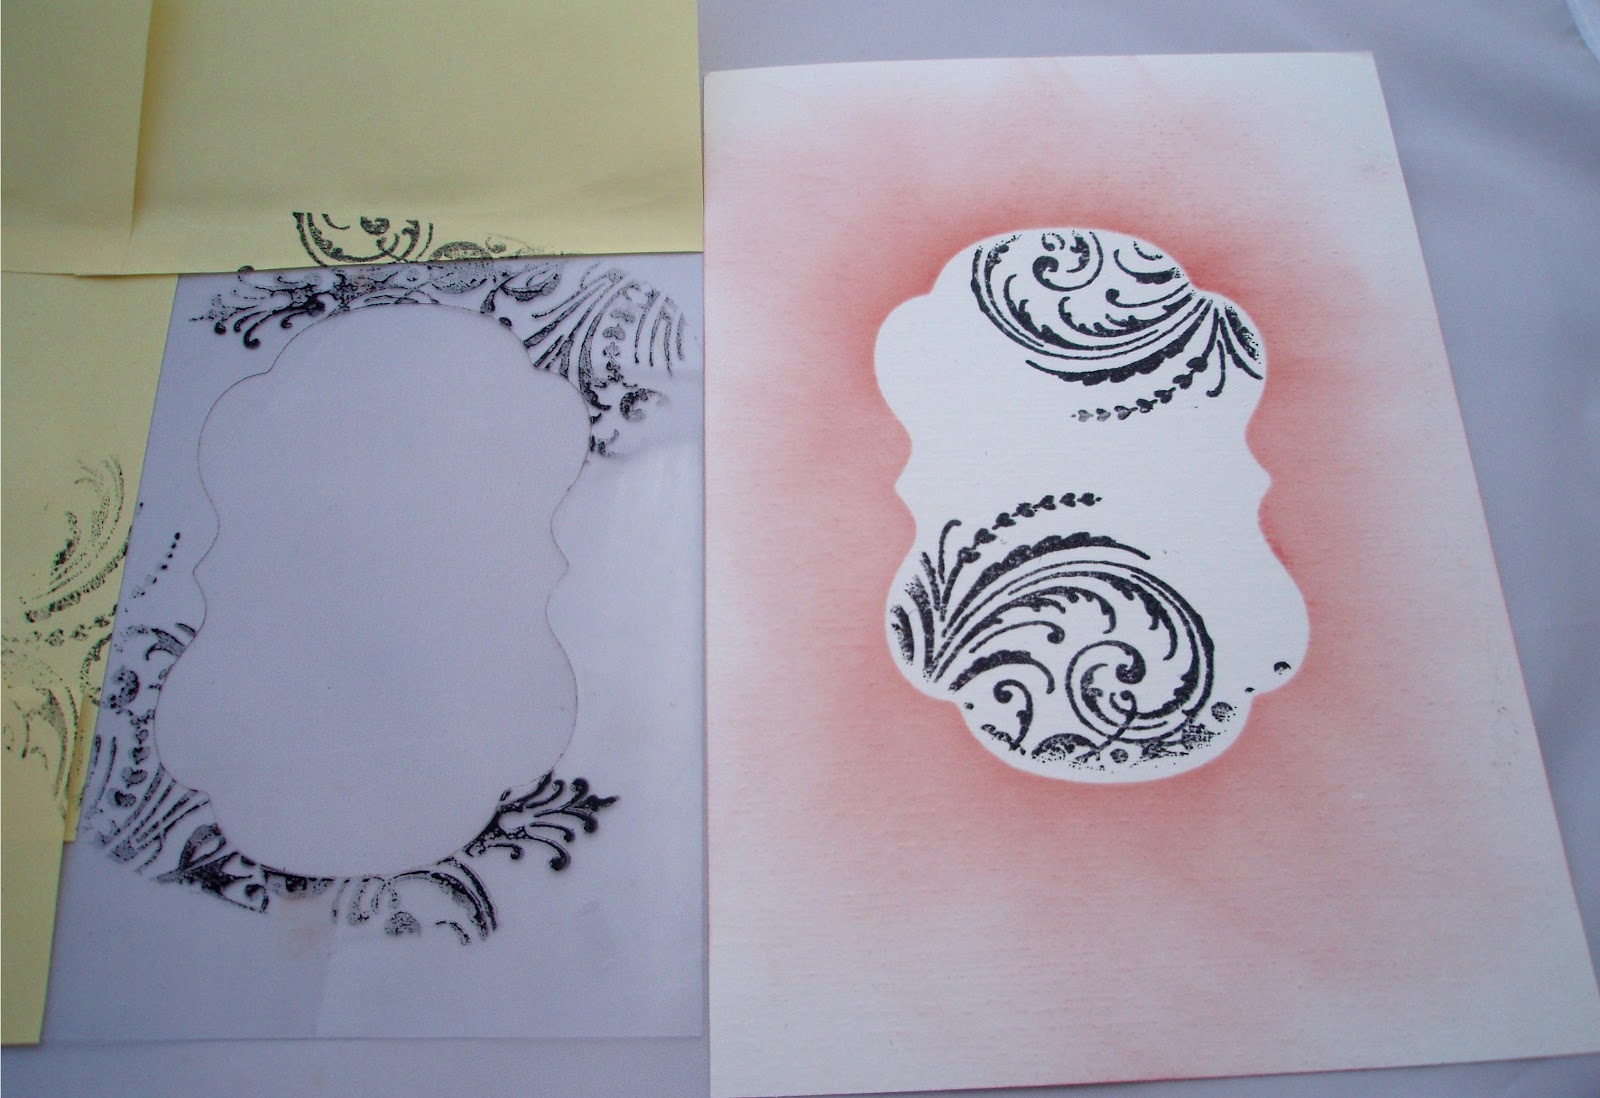
Step Two: Adhere your acetate in the correct position using tiny bits of removeable tape. I then used some sticky notes to protect any uncovered cardstock. Next, using your preferred tool, apply your ink of choice and swirl it through the aperture until the required depth of colour is attained. Add deeper tones to the outer edges if you want to create a center soft focus effect. (Sorry mine is shown after I have stamped as I forgot to photograph it before!)

Step Three: Remove the acetate and then stamp over the ink shape with your chosen stamp. Take care to clean your acetate now with a wet wipe or just a damp cloth, dry and store till next time.
STORING YOUR TEMPLATES. Write the die name on the acetate with a permanent marker and store them in polypockets in an A4 file. Arrange them in the same order as your dies are stored to make searching easy.

USING THE DIECUT SHAPE
Step One: Adhere the acetate diecut to your chosen cardstock with tiny bits of removeable tape and then with your ink applicator apply the ink all around in a small circular motion or with outward sweeping strokes.
(I have done this purely for the demostration not for an actual card, so it is unfinished)

Step Two: Remove the die to expose the open shaped area and clean the acetate with a wet wipe or damp cloth. Dry and store as above.

Step Three: Using your Aperture (waste) piece of acetate, place it over the shape and stamp through the aperture, taking care to press all over the stamp to ensure the image reaches the outer edges.
Step Four: Remove the acetate, clean as before and then use your finished design as desired. (I am going to cut mine down now to enclose all the red inked area and use it as a backdrop to a sentiment on a Spellbinders Fancy Tag) Perfect, a background and matt all in one!
I do hope you like my little tutorial and will have a play yourself. It is wonderful the things you can do with bits of old plastic, ink and some inspiration. I'd love to see what you do, so maybe you could let me know if you use this techinique at any time and I could take a look.
Well, have a good day and stay crafting!! (Oh lord, I am getting to sound like Bruce Forsyth.....LOL!!) See you soon Linda xx
Hi Linda, glad you're back. Thanks for showing us this way of recycling and getting two very useful tools from one piece of packaging. And thanks for the easy steps tutorial too - very useful. Enjoy the rest of your day. love from Christine xx
ReplyDeleteThank you Christine, it's lovely to be back. I really enjoy doing the tutorials. I am not always sure if they are going to be useful to everyone but, personally, I find that from one persons idea, sometimes others spot ideas of their own. So with that in mind I believe even the smallest tips and tricks are worth sharing.
DeleteHope you have a wonderful day. Love Linda x
Hi Linda,
ReplyDeleteas Christine said lovely to have you back. Well you haven't been idle have you. Loved the tutorial fab idea. Must have a go at that one. It's funny how we all think alike and it coincides. Yesterday Sue and her Mum and me and Mine. Now today you with the acetate and Sue with hers. Thank you for sharing. Have a great crafty day everyone, and yes it's me I've changed my profile picture.
Lots of crafty love. Jenny L.
Hi Linda,
ReplyDeleteIt's me again. Forgot to thank you for your comments yesterday, and all your lovely support. You are a real treasure.
Lots of crafty love. Jenny L.
Hi Linda, good to have you back, super tutorial too! I love using up the Spellbinders packaging! Hugs, Carole Z X
ReplyDeleteglad to have you back ,great tutorial you are a star ,Melanie
ReplyDeleteFabulous tutorial Linda. A great idea and you always explain things so clearly.
ReplyDeletetake care
Hugs Sue
Hi Linda, I simply love what you have done here, I would never have thought to do something like this, the tutorial is fantastic, thank you so much. Lots of love from Patricia xx
ReplyDeleteHi Linda
ReplyDeleteGreat idea! Fabulous tutorial! Sorry I haven't visited your blog in a while!
Have a great day!
Sarah x
Hi Linda, lovely to have you back, we do miss you but no pressure lol! A fantastic tutorial clearly explained and recycling to boot, thank you. It's great to have these tutorials in our armoury and again thank you for sharing your brilliant ideas with us. Looking forward to your next tutorial.
ReplyDeleteStay calm and keeeep crafting lol (sorry couldn't resist). L&h Christine H xx
Thank you Christine, I am so glad you think it may be of use.
DeleteI hope you are well and crafting. Don't forget to send me some more pictures of your fab cards so I can show them to the blogging world for you.
Best wishes and hugs Linda x
Hi Linda, So please you felt well enough to do this tutorial..What a Brilliant idea!!!!..I love all your ideas and have used them all so far. BTW your tutorial/storage link isn't working at mo, it says the page does not exist. Which of course is not true, cos I've looked in it before..Enjoy the rest of your day...:)...xxxx
ReplyDeleteThank you so much for those kind words. I am so thrilled you enjoy my tutorials and storage ideas. I have managed to do more over the past few days, so keep an eye on the blog over the next week as I will be posting them.
ReplyDeleteI have taken a look at the Tutorial&Storage tab at the top of the blog and I think I must have had a few Gremlins in the system. Anyway it seems to be working fine now. Thank you for bringing this to my attention.
I will keep uploading all my new tutorials and others from talented crafters that I think would benefit my followers/readers.
Take care Linda x
This is wonderful Linda, what a simple but very effective idea.
ReplyDelete